
 search
I/N:
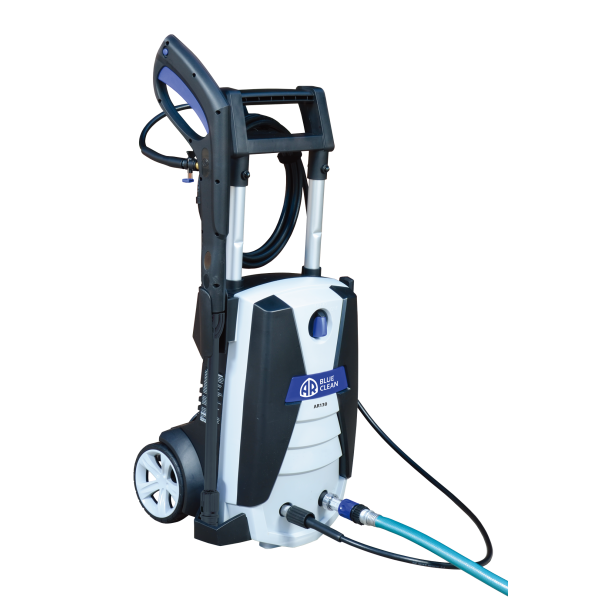
AR130
PRESSURE WASHER ELECTRIC 1800W AR
$399
access_time
Hurry!
10 left in stock
10 left in stock
PAY OPTIONS

- 1885 Max PSI
- 7.3 Litres Per Minute
- 1800W INCLUDES:
- Spray Gun
- Variable Spray Nozzle Lance
- Turbo Nozzle Lance
- Fixed Brush
- 8m HP Hose with Quick Connect
Brand
SPTools
User Manual HTML

1885 MAX
P S I
Electric Pressure Washer
ASSEMBLY, CARE AND
USE INSTRUCTIONS
Model AR130
READ CAREFULLY
IMPORTANT: RETAIN THESE INSTRUCTIONS
AND ATTACH RECEIPT TO MANUAL FOR FUTURE
REFERENCE
Questions, problems, missing parts?
Before returning to your retailer, contact our customer service department,
8:30 am - 5:00 pm, Monday - Friday. service@austechindustries.com.au

TABLE OF CONTENTS |
|
Product Specifications |
2 |
Package Contents |
3 |
Hardware Contents |
3 |
Safety Information |
4 |
Assembly Instructions |
6 |
Operating Instructions |
10 |
Care and Maintenance |
13 |
Troubleshooting |
15 |
Limited Warranty |
16 |
INTENDED APPLICATION
This pressure washer is intended for:
DOMESTIC CLEANING APPLICATIONS
PRODUCT SPECIFICATIONS
SPECIFICATIONS
|
Maximum PSI |
Max LPM |
|
|
|
Weight |
Model |
(lbs/sq. in.) |
(Litres/per min) |
Cold Water |
Volts |
Watts |
(Kg) |
AR130 |
1885 |
7.3 |
✔ |
240 |
1800 |
10 |
2

PACKAGE CONTENTS
|
C |
AA |
|
|
E |
A |
B |
D |
|
G
F 


 I
I
H


 K
K
J
PART |
DESCRIPTION |
QUANTITY |
A |
Pressure Washer Unit |
1 |
B |
Spray Gun Holster |
1 |
C |
Nozzle Cleaning Wire |
1 |
D |
High Pressure Hose |
1 |
E |
Nozzle Tray |
1 |
F |
Variable Spray Nozzle |
1 |
|
Lance |
|
PART |
DESCRIPTION |
QUANTITY |
G |
Fixed Brush |
1 |
H |
Transparent Water Filter |
1 |
I |
Turbo Nozzle Lance |
1 |
|
|
|
J |
Spray Gun |
1 |
K |
Spray Gun Trigger Lock |
1 |
AA |
Screw |
1 |
HARDWARE CONTENTS
AA
Note: Screw is located in package with manual
Screw
Qty. 1
3

SAFETY INFORMATION
Please read and understand this entire manual before attempting to assemble, operate, or install the product.
This manual contains information that relates to PROTECTING PERSONAL SAFETY and PREVENTING EQUIPMENT PROBLEMS. It is very important to read this manual carefully and understand it thoroughly before using the product. The symbols listed below are used to indicate this information.
 DANGER
Potential hazard that will result in serious injury or loss of life.
 WARNING
Hazard that could result in serious injury or loss of life.
 CAUTION
Potential hazard that may result in moderate injury or damage to equipment.
Note: The word “Note” is used to inform the reader of something the operator needs to know about the tool.
WARNING
To reduce the risk of injury, the user must read and understand the instructions before using this product.
1.Warning – When using this product basic, precautions should always be followed, including the following
2.Read all the instructions before using the product
3.Know how to stop the product and bleed pressures quickly. Be thoroughly familiar with the controls.
4.Keep operating area clear of persons
5.Do not overreach or stand on unstable support. Keep good footing and balance at all times.
6.Follow the maintenance instructions as specified in the manual
7.To avoid personal injury and/or damage to property and to maximize your pressure washing experience, carefully follow all of the safety tips, instructions, warnings and safeguards and become familiar with all of the controls.
8.This pressure washer conforms to CSA and other safety and consumer standards. DO NOT modify or rebuild any part of your power washer.
9.DO NOT use your pressure washer when you are under the influence of alcohol or drugs. Use this
power tool carefully and only when you are alert.
10.Watch your balance and footing while using your pressure washer. Surfaces become slippery when wet and are extra slippery when using a detergent or cleaner.
11.NEVER operate the pressure washer in bare feet, sandals, or
12.When using the pressure washer near children, make sure they are closely supervised by an adult to avoid injury. NEVER let a child use the pressure washer.
13.Keep fingers, hands, feet and any part of your body clear of the stream of high pressure water. The powerful spray can cause blindness or blast holes in the skin. It can break a window if you are too close when you pull the trigger on the spray gun.
14.ALWAYS wear eye protection to prevent injury to eyes when operating the pressure washer.
15.To avoid mishaps or injury, ALWAYS use the trigger safety lock when not using the pressure washer even if the spraying stops for a moment.
16.Point the spray gun in a safe direction when beginning a pressure washing session.
17.NEVER spray directly at a person, animal, electrical device or the unit itself.
18.When first using the spray gun, hold the spray gun and lance with two hands when pulling the trigger (one hand to pull the trigger and the other to stabilize the gun assembly) until you get used to the “kickback” from the spray gun.
19.When you press the power switch to turn off the pressure washer, water pressure may remain in the system. To discharge the pressure, point the spray gun in a safe direction and pull the trigger.
20.NEVER spray flammable liquids.
21.NEVER use the pressure washer in areas that contain combustible dust, liquids or vapors.
22.Avoid contact of the pressure hose with sharp objects and examine the hose regularly. Replace if damaged. Due to the high pressure involved, it cannot be repaired if cut or damaged.
23.Only use detergent specifically formulated for pressure washers and follow instructions on the detergent’s label.
24.Protect eyes, lungs, and skin from exposure to detergent. Dish or laundry soap is too thick and will clog the nozzle of your detergent bottle.
4

SAFETY INFORMATION
IMPORTANT: Store the pressure washer indoors to prevent the water in the unit from expanding under freezing conditions. When the water freezes and expands, your pressure washer will be damaged and become inoperable. Or, if storing outdoors, it is recommended you use pump saver (not included) to protect pumps.
25.NEVER use hot water with your pressure washer. It will overheat and damage the high pressure pump.
26.NEVER leave the pressure washer unattended while it is powered “ON”.
27.ALWAYS turn the water supply “ON ” before turning the pressure washer power to “ON”. Running
the pump dry will cause damage to the internal components.
28.NEVER use a water supply to your pressure washer that exceeds 150 PSI maximum.
29.NEVER disconnect the high pressure hose from the pressure washer while the system is pressurized.
30.NEVER permanently engage the trigger mechanisms on the spray gun.
31.NEVER operate the pressure washer unless all components are properly and securely connected.
32.NEVER allow the pressure washer pump to run for more than one minute after you have turned off the water supply. This can cause the motor and pump to overheat and fail.
33.NEVER use lances or other parts that are not compatible for this specific AR Blue Clean unit.
34.NEVER spray any electrical outlet with your pressure washer.
35.Inspect the power cord before using. DO NOT use it if it is damaged.
KEEP THESE INSTRUCTIONS FOR FUTURE REFERENCE.
Servicing of a
In a
Replacement parts for a
“Double Insulated” products are marked with symbol shown here.
Double Insulated symbol
5

PREPARATION
Before beginning assembly of product, make sure all parts are present. Compare parts with package contents list and hardware contents list. If any part is missing or damaged, DO NOT attempt to assemble the product.
Tools Required for Assembly (not included): Phillips screwdriver
Estimated Assembly Time: 5 minutes
ASSEMBLY INSTRUCTIONS
1B
A
Power Unit Assembly
Slide the spray gun holster (B) onto left side, when facing the pressure washer unit (A).
Note: When placing the gun with the lance attached, the nozzle will rest in this tray.
2 |
|
AA |
|
E |
A |
|
Slip tab into slot and screw the nozzle tray (E) on bottom left, when facing the pressure washer unit (A).
Secure with screw (AA).
Note: DO NOT use a power screwdriver. When all free play has been taken up, give a small final clockwise twist of the screwdriver.
DO NOT overtighten.
Hardware Used:
AA |
Screw |
x 1 |
6

ASSEMBLY INSTRUCTIONS
3
A

 D
D
High Pressure Hose Assembly
Screw high pressure hose (D) clockwise onto bottom left, when facing the unit, front of pressure washer unit (A). Pull back collar and insert
Note: DO NOT use pliers or locking pliers to tighten.
4
J
D

5
J
1
D |
2 |
Connect the other end of high pressure hose (D) to spray gun (J) by inserting the brass metal tip of high pressure hose into the fitting just ahead of trigger guard. It will lock into spray gun with a “click”. Confirm hose is locked into spray gun by slightly pulling on them. The hose is now securely attached to spray gun.
Note: DO NOT press button on underside of gun when connecting hose to gun.
To release hose (D) from spray gun (J), press button on underside of gun toward trigger guard. The hose will slide out from connection.
7

ASSEMBLY INSTRUCTIONS
6 |
|
Lock |
|
|
J |
1 |
2 |
|
|
K |
|
|
|
Unlock |
|
J |
|
|
2 |
1 |
|
|
Locking Spray Gun (before Lance installation) To lock the trigger of the spray gun (J), aim the gun away from you and push the lock button from right to left. After doing so, squeeze or pull the trigger to make sure it is locked and will not move. Always leave lock button in locked position when not in use. This ensures the gun is in “safe” mode until it is ready for use.
7 |
F |
I |
|
||
|
J |
|
|
1 |
|
|
I |
|
|
2 |
|
Variable Spray Nozzle Lance and Turbo Nozzle Lance Installation
While the spray gun (J) is in the locked position, insert the variable spray nozzle lance (F) or turbo nozzle lance (I ) into the end of the spray gun, by inserting and pushing together turning clockwise simultaneously. To remove, push together and turn counterclockwise. Note: Always push the safety lock button to lock the trigger when changing lances to ensure that they do not accidentally eject with force during removal.
Note: When using the turbo lance, make sure the turbo nozzle is screwed on tight at the end of the lance each time you use it.
Note: Turbo nozzle is not adjustable.
8 |
G |
J |
G |
J |
G |
8 |
Fixed Brush Installation
The fixed brush is specially designed to clean rims and vehicle wheels.
Screw the adaptor for the spray gun onto the fixed brush. Then align the tongues of the adaptor with the grooves of the spray gun (J) and insert it.
Securely fit the fixed brush by turning it clockwise until it locks into place.
Press the fixed brush towards the lance extension and turn it anticlockwise to remove it.

ASSEMBLY INSTRUCTIONS
9
A
H
Garden Hose Adapter Installation
Remove plastic shipping cover on water inlet, front right side when facing the unit (A). Install the transpar- ent water filter (H) by hand tightening clockwise.
10
L
 1
1
2 
You will need a quick connect hose adapter (not supplied) fitted to the end of your garden hose (L).
Note: Flush out garden hose before connecting to QC garden hose adapter.
11
H
L
Push the QC garden hose adapter (L) onto the transparent water filter (H). It will “click” into place. Do not pull the sleeve back while pushing QC garden hose adapter (L) onto the transparent water filter (H). The water is now connected to your pressure washer.
Note: To remove water hose, pull back on collar and it will slide off the transparent water filter. This can be done at any time.
You have now completed the assembly and are ready to begin using your electric power washer. Read and observe all safety instructions.
9

OPERATING INSTRUCTIONS
• Turn the tap on fully to ensure good water supply.
• Make sure the “ON/OFF” switch is in the “OFF” position. The power switch has international symbols for ‘on’ and ‘off’: On (|) Off (O).
• Unwind the power cord completely and plug it into a 240 volt outlet.
• Release safety push trigger lock up and back into trigger. While pointing the spray gun in a safe direction, squeeze the trigger on the spray gun until there is a steady stream of water, letting the water and air out of the hose. Push trigger lock back down to lock back into place.
OFF/0ON/I |
OFF/0ON/I |
•Turn the power switch to the “ON” (|) position. The unit will turn on for 1 - 2 seconds and shut off. This is a normal function of the auto start feature. Squeeze the spray gun trigger to begin pressure washing.
•Begin pressure washing by squeezing the trigger on the spray gun all the way into the handle.
•Release the spray gun trigger to stop the pressure washer.
•Allow the motor to come to a complete stop before squeezing the trigger again.
•Squeezing rapidly will cause the auto start feature to miss an on/off cycle that may prevent it from turning on while squeezing trigger after rapid squeezing. Use slow deliberate trigger pulls to avoid such symptoms.
•Always test a small area to avoid chance of damaging the surface.
10

OPERATING INSTRUCTIONS
Fan Spray |
Pencil Stream |
• When using the detergent, fill it with a properly |
formulated detergent or cleaner with water ratio |
according to instructions on the container. |
• DO NOT use thick |
Using Variable Spray Nozzle
•When using the variable spray nozzle, the spray pattern and intensity can be adjusted for each task by twisting the spray nozzle at the far end of the lance.
the power washer and can cause damage. |
||||
|
|
|
|
|
|
|
|
|
|
|
|
|
|
|
|
|
|
|
|
|
|
|
|
|
|
|
|
|
|
|
|
|
|
|
|
|
|
|
|
|
|
|
|
|
|
|
|
|
|
•When removing the detergent tank remove lid and place finger in tank lifting up while pulling tank out.
IMPORTANT: Detergent can only be applied by using the spray gun (J) without any lances attached
11

OPERATING INSTRUCTIONS
Using Power Cord
•Easily remove the power cord from side of unit by swiveling the bottom blue cord hook to the right or left until it faces up. The power cord then can be easily slid off of the side of the power washer unit.
•Swivel blue, cord hook back down when ready to wrap the cord back into place for storage.
2
2
1 |
1 |
Operation Tips
•If you hear the motor run intermittently when the trigger is not being squeezed, that is normal.
The pump is priming itself so it is ready to operate when the trigger is squeezed. Turn off the power washer if not being used after five minutes.
•The
•Keep the nozzle cleaning wire for use in unclogging the nozzle. If you lose the cleaning wire, a straightened paper clip also works.
How to Avoid Damaging Surfaces
•Damage to surfaces being cleaned occurs because the impact force of the water pressure exceeds the durability of the surface. Bare wood can be penetrated; paint can be peeled off, etc. You can vary the force of your power washer by controlling:
1.The angle of the surface being cleaned
2.The distance of the nozzle from the surface being cleaned
•NEVER use a narrow high pressure stream of water on soft surfaces susceptible to damage.
•Use the variable spray nozzle lance when cleaning windows. Be sure to adjust the nozzle to low spray and place the nozzle approximately four to five feet away from the window with the nozzle at forty five degree angle. Squeeze the trigger and vary the spray pattern and angle until optimum cleaning efficiency is achieved.
Extending and Lowering Handle
•Extend the handle up by pressing the blue button in the cord hook and pull handle up until it locks in place.
Note: If handle does not slide up easily, add some petroleum jelly (not included) to help make it glide easier.
•Lower the handle by pressing the center of the upper cord hook and push down on the handle until all the way down.
12

CARE AND MAINTENANCE
Detergents
•Use detergents designed for pressure washers.
•This system applies detergent under low pressure. The cleaning power of the detergents is enhanced when applied with low pressure and enough time is given to break down dirt and grime. The combination of low pressure and chemical action is very effective and can be better than scrubbing if applied properly. ALWAYS spray detergent on a dry surface. DO NOT
the detergent and reduces its cleaning ability. DO NOT allow detergent to dry on surface. On vertical surfaces being cleaned, apply detergent to lower surfaces and work your way up to prevent detergent from causing streaks in the dirt and grime. Rinse detergent by pressure washing from bottom up for same reason.
•If a stain is particularly tough, it may be necessary to reapply the detergent and use a bristled brush to scrub the stain. Subsequent pressure washing after brushing should successfully complete your cleaning job.
Cleaning Nozzles
•A clogged or partially clogged nozzle can cause significant reduction of water pressure coming out of the nozzle and/or cause the unit to pulsate while spraying.
•Turn off the unit.
•Turn off the water supply to the unit.
•Relieve any pressure trapped in the hose by squeezing the trigger
•Remove the lance from the spray gun
•Using the nozzle tip cleaner provided (or an unfolded paper clip), insert the wire into the nozzle hole and move back and forth until debris is dislodged.
•Tap quick connect end of lance on hard surface several times
•Back flush water through the nozzles using garden hose and highest pressure available (either standard water nozzle or use your thumb over the nozzle to create water pressure for back flush).
Cleaning the Transparent Water Filter
•The screens inside the transparent water filter should be cleaned periodically. Rinse it with clean water, and then place it back in the adapter.
13

CAREOPERATINGAND MAINTENANCEINSTRUCTIONS
Storage
•When your pressure washing session has been completed, turn off the power switch located on the front of the pressure washer. Unplug the power cord from the outlet. Turn off the water supply. Pull the trigger on the spray gun
•Remove detergent bottle and clean completely. Residual chemical will dry out in the container and can cause the detergent injector to clog and prevent function.
•Remove high pressure hose from spray gun.
•Remove lance from the gun. Place the gun in the holder on the side. Lances are placed into any of the slots in the back of the unit. Make sure to discard any remaining detergent from the bottle. Flush the bottle and nozzle head with fresh water to prevent clogging.
•Hook the power cord around the cord hook on the right side of the machine when facing it.
•The pressure hose is stored on the hose hook located on the back of the handle.
14

TROUBLESHOOTING
|
PROBLEM |
CORRECTIVE ACTION |
|
|
|
|
|
|
Unit will not turn on. |
1. |
Check the power cord is plugged directly into an outlet. |
|
|
2. |
Do not use an extension cord. |
|
|
3. |
Make sure the power switch is turned on. |
|
|
Note: When power switch is turned on, the pressure washer will turn on by itself for |
|
|
|
seconds and shut off. This is normal. |
|
|
|
|
|
|
The high pressure |
1. |
In most cases, the spray gun is not the problem. The problem is the rubber sleeve |
|
(HP) hose will |
|
covering the fitting at the end of the high pressure hose. It has likely slipped up toward |
|
not connect/stay |
|
the metal tip. To fix: wiggle, twist and/or pull the rubber sleeve down until the entire tip |
|
connected to the |
|
is visible plus an 1/8 in. of the metal fitting below the tip. Now try to insert the hose tip |
|
spray gun. Is this a |
|
into the spray gun. It should “click” into place and will not come out until the hose is |
|
spray gun problem? |
|
released by pushing in the lever on the underside of the gun. You may cut away the end |
|
|
|
of the sleeve with a sharp knife if unable to move the sleeve down. Be careful not to cut |
|
|
|
or puncture the hose. |
|
|
2. |
Do not push in the release button when connecting the high pressure hose. |
|
|
|
|
|
The unit is running |
1. |
Check the water source. Unclog the nozzle on the lance. (See nozzle cleaning |
|
but there is no water |
|
instructions under “Cleaning nozzles”.) Or take off the lance and just spray out of the |
|
flow. |
|
spray gun. This will indicate if the problem is with the lance. |
|
|
2. |
Reconnect the QC Garden Hose Adapter to the clear quick connect. |
|
Why is water leaking |
1. |
Make sure there is an |
|
where the high |
|
no |
|
pressure hose |
|
|
|
connects to the spray |
|
|
|
gun? |
|
|
|
|
|
|
|
I can’t remove the |
1. |
All lances and the detergent bottles are attached and removed from the extension |
|
lance from the spray |
|
lance in the same manner. Insert the |
|
gun. What should I |
|
into the extension lance. Press the extension lance and lance together (about a 1/8”) |
|
do? |
|
and turn clockwise. The lance will lock in place. Remove the lance by reversing this |
|
|
|
procedure. Press the extension lance and lance together and turn counter clockwise. |
|
|
|
The lance will slide out. |
|
|
2. |
Or, hold the extension lance and lance in an upright position with the nozzle end on |
|
|
|
the floor. Push the whole assembly straight down to loosen the connection, and then |
|
|
|
follow the removal process again. You may also spray soapy water or a lubricant in the |
|
|
|
area where the lance connects to the extension lance. |
|
|
|
|
|
The pressure |
1. |
It sounds like your pressure washer is working just fine. When the water is connected, |
|
washer turns on for |
|
the accessories are assembled properly, and the power switch is turned on, the |
|
2 seconds, shuts |
|
pressure washer may turn on for 1 - 2 seconds to prime the pump. It automatically |
|
off, and will not turn |
|
shuts off and waits for the spray gun trigger to be pressed. When the trigger is pressed, |
|
back on. Do I have a |
|
water starts flowing through the pump. The water sensor in the pump “senses” the |
|
defective unit? |
|
moving water and automatically turns the pressure washer on. |
|
|
2. |
Turn the power switch to off, hold in the trigger on the spray gun, so that you have a |
|
|
|
steady stream of water. While you are holding the trigger open on the spray gun, at the |
|
|
|
same time, turn the power switch on. |
|
|
|
|
15
LIMITEDCARE ANDWARRANTYMAINTENANCE
This Limited Warranty applies only to new products* distributed by Austech Industries Pty Ltd (“Austech Industries”). It is a condition of this Limited Warranty Policy that the purchaser read the owner’s manual for the product and only use the product to the extent or for the purposes stated therein. The purchaser must also ensure that all servicing requirements are completed as listed in the owner’s manual (said servicing is at the owner’s expense). We recommend that all servicing is completed by an authorised service agent and that records of said servicing are retained by the purchaser as proof in the event of a warranty claim.
Whilst the owner’s manual, packaging, and/or other documentation supplied with Austech Industries’ products may provide details in respect of a Limited Warranty, the terms set out herein supersede these matters, and this Limited Warranty applies in their place. This warranty is no less advantageous than otherwise described in such other documentation.
Austech Industries agrees, subject to the terms and conditions specified below, to repair or replace at Austech Industries’ cost, the product purchased by you when the product does not perform in accordance with its specifications during the limited warranty pe- riod, due to any fault in manufacturing, materials and/or workmanship. Austech Industries is not liable to repair or replace products that the purchaser uses in a manner that is inconsistent with the owner’s manual or in the circumstances set out in paragraphs 1.1 – 1.7 below.
The benefits to the purchaser under this warranty are in addition to other rights and remedies under the Competition and Consumer Act 2010 (Cth).
The limited warranty period, within which a defect in the product must appear, commences from the date of purchase and ceases on expiration of the specified term below.
The Limited Warranty Period
•Motor and pump assembly - 24 months
•All Accessories: including the spray gun, lance, high pressure hose, wheels etc. - 12 months
The purchaser’s attention is drawn to the following
•To the extent permitted by law and subject to this Limited Warranty, and as part of the terms of the sale of the equipment or part thereof: Austech Industries shall not be liable for any form of loss, damage, cost, injury or harm of any kind (whether direct, indirect, special or consequential) howsoever arising from the use or supply of the equipment to the purchaser.
Exclusions to Limited Warranty Policy
This Limited Warranty will not apply where the equipment or any part thereof:
1.1Fails due to an accident (including liquid spillage), abuse, misuse, neglect or normal wear and tear;
1.2Has been used in a manner other than for which it was originally designed;
1.3Has been tampered with or is otherwise than as supplied by Austech Industries;
1.4Where any damage, malfunction or other failure of the equipment or any part thereof resulted directly or indirectly from unauthorized persons, adjusting or failing to adjust any part requiring normal maintenance and service (examples include adjustment of tappets, air filter maintenance, lubrication and tightening of screws nuts and bolts);
1.5Malfunctions due to the use of defective or incompatible accessories;
1.6Is damaged by lightning or thunderstorm activity; or
1.7Has been transported to a country where no authorised Service Agents exist.
Claiming warranty
This Limited Warranty may be claimed on in the following manner:
2.1In order to make a claim under this Limited Warranty, the purchaser must deliver the equipment or any part thereof to an
Austech Industries authorised repair agent and pay all costs of transportation and all costs incidental to making a claim under this Limited Warranty. The purchaser must first contact Austech Industries (contact details described above) and request the delivery ad- dress of an Austech Industries authorised repair agent.
2.2The purchaser must deliver to the repair agent written reasons why the purchaser considers that the purchaser has a claim under this Limited Warranty and must provide all necessary details, including:
· The place, date and from whom the unit or part was purchased.
· The unit or part involved, Model and Serial Number.
· The defect, malfunction or failure in respect of which the claim is being made.
· Proof of service of the unit or part (if applicable)
· Proof of purchase in respect of the unit or part.
2.3If the Limited Warranty claim is valid, the repair agent will carry out repairs and return the product at no charge to the purchaser.
These repairs are limited to the Limited Warranty fault identified and as such will not include any other faults due to misuse, abuse, failure to maintain, fair wear and tear or the replacement of serviceable items such as oil, spark plugs, air filters, fuel etc.
Our goods come with guarantees that cannot be excluded under the Australian Consumer Law. You are entitled to a replacement or refund for a major failure and for compensation for any other reasonably foreseeable loss or damage. You are also entitled to have the goods repaired or replaced if the goods fail to be of acceptable quality and the failure does not amount to a major failure.
* AR & SP are brand names of products distributed by Austech Industries
Note # Units which are failing to perform in accordance with specifications due to
16 |
Printed in PRC |
Write Your Own Review
NEED ANSWERS
Pickup In Store
Norva Tools is one of Melbourne's renowned trade tools stores, and no matter what your tools requirements are, we have you covered. If you don't want to pay for delivery or need your items ASAP, you can pick it up from our tools warehouse in Dandenong, Melbourne. Just bear in mind not all items are in stock. You'll be able to see if they do during the checkout process.
Estimated Delivery Timeframes
If you opted to collect your items, you will receive an email to inform you when your goods are ready for collection.
If you opted for delivery, you will receive an email when the goods have been despatched to the couriers with details so you can track our order.
We aim to despatch all orders within 1-2 business days. In the unusual event of a delay to the dispatch of your order, you will be contacted at the earliest opportunity. Once the order has been despatched the estimated delivery time is as follows:
- Metro (Excludes Hobart Metro) 1-2 business days
- Hobart Metro 3-4 business days
- Regional Areas 3-4 business days
- Remote Areas 6-9 business days
Please note that these delivery timeframes are estimates and are not guaranteed.
Returns
Changed your mind? No worries. You just need to get the product back to us within 14 days, unused and in its original packaging and we'll give you a refund (excluding delivery costs). You can read our full returns policy here (special order items are excluded from this returns policy).
The information below is required for social login
Sign In
Create New Account